Страница 4
COMPLETE SET • КОМПЛЕКТАЦИЯ КОМПЛЕКТ ВИНТОВ И ШАЙБ ДЛЯ КРЕПЛЕНИЯ К МОНИТОРУ M4*8mm x 4 M4 *12mm x 4 M5*8mm x 4 M5*12mm x 4 D E F G Кронштейн с креплением №1 х1 M6*12mm x 4 M6*8mm x 4 Ø4 х 4 Ø5 х 4 Ø6 х 4 I H A B C Крепл…
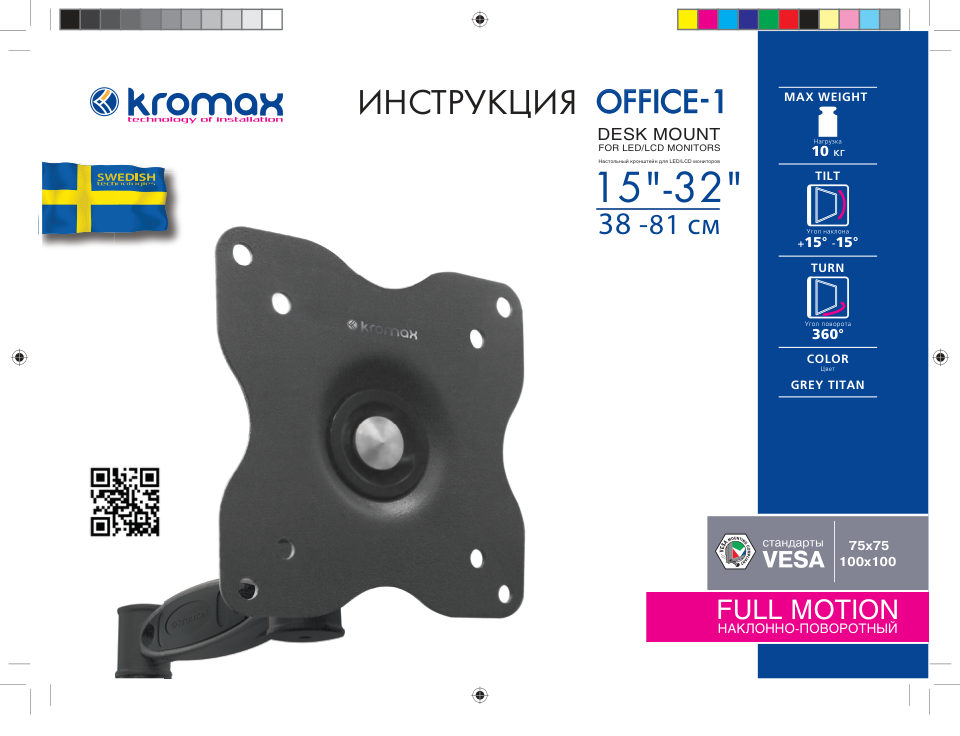
Читать страницуКарточка инструкции: Кронштейн Kromax Office-1. Документ содержит 16 страниц. Раздел: Крепления для мониторов. Бренд: Kromax. Доступны оглавление, просмотр по страницам и PDF для скачивания.
Раздел: ПК, ноутбуки, периферия / Периферия и аксессуары / Крепления для мониторов
Бренд: Kromax
COMPLETE SET • КОМПЛЕКТАЦИЯ КОМПЛЕКТ ВИНТОВ И ШАЙБ ДЛЯ КРЕПЛЕНИЯ К МОНИТОРУ M4*8mm x 4 M4 *12mm x 4 M5*8mm x 4 M5*12mm x 4 D E F G Кронштейн с креплением №1 х1 M6*12mm x 4 M6*8mm x 4 Ø4 х 4 Ø5 х 4 Ø6 х 4 I H A B C Крепл…
Читать страницуШАГ 1 STEP Шестигранный ключ S=3 (J) VESA пластина Страховочный винт L EN - Use the Inner hexagon spanner S=3(J) to loosen the locking screw in order to separate the table fixation and VESA plate. - According to the thi…
Читать страницуШАГ 2a STEP Столешница Ручка Крепление 1 EN Install the bracket to the desk - Select right holes on the mount (1) according to the thickness of desk. - Insert the mount (1) to the edge of the desk then tighten the knob…
Читать страницуШАГ 2b STEP EN Install the bracket on the top of desk - Remove the mount (1) from the bracket at first. - Install the mount (2) to the bracket. - Install the bracket to the top of the desk. Screw must pass through the h…
Читать страницуШАГ 3 STEP A/B/C D/E/F/G/H/I Монитор EN - Attach the VESA plate to the back of monitor using right screws (D/E/F/G/H/I/) and washers (A/B/C). - The VESA plate mounted on the TV back should be mounted symmetrically and e…
Читать страницуШАГ 4 STEP Страховочный винт VESA пластина Направляющие Кронштейн Направляющие отверстия EN - Insert the monitor with VESA plate into the bracket, then use the Inner hexagon spanner S=3(J) to tighten the screw firmly. R…
Читать страницуШАГ 5 STEP K Монитор ±15° ±90° 360° EN - Adjust the position and angle of the monitor for convenient viewing. - Using the inner hexagon spanner S=4 (K) to loosen the bolt before adjusting the view angle, and firmly tigh…
Читать страницуШАГ 6 STEP Монитор Накладки Кабель EN - Run the cable through the cable clips holder. - Make sure the сcables are not deformed when adjusting the position. RU - Установите соединительные провода в специальный кабель кан…
Читать страницу